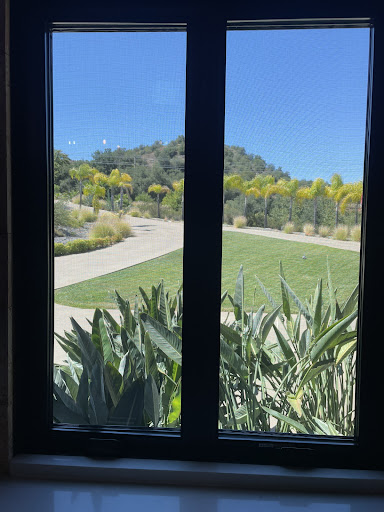
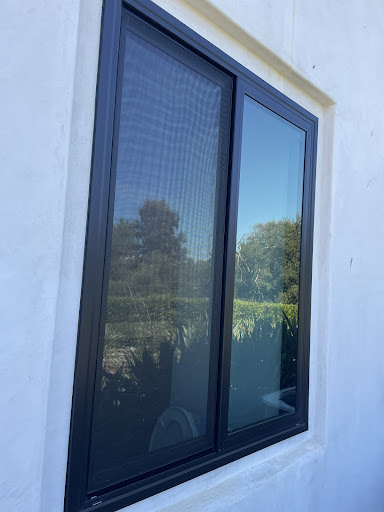
Bay windows add character and natural light to homes. Over time, however, they could need replacement due to wear and tear, damage, or energy efficiency concerns. These architectural features extend outward from the main wall structure, creating additional interior space while offering panoramic views of the outdoors. When bay windows begin showing signs of deterioration, like drafts, moisture between glass panes, or they become tough to open and close, replacement becomes necessary to maintain home comfort and value.
The process of replacing a bay window involves several important steps that homeowners should understand before beginning this home improvement project. Removing old bay windows needs careful attention to structural support, while proper bay window installation steps ensure the new unit functions correctly and provides years of reliable performance. The project typically requires specific bay window replacement tools and materials, making preparation a key to success.
Modern replacement bay windows offer improved energy efficiency compared to older models, potentially reducing heating and cooling costs while enhancing curb appeal. The installation timeline varies depending on the complexity of the existing structure and whether homeowners choose DIY bay window replacement or professional installation. Understanding the process helps homeowners make informed decisions about this home improvement investment that transforms both interior living spaces and the exterior’s appearance.
Essential Tools and Materials for Bay Window Replacement
A successful replacement requires specialized bay window replacement tools designed for both removal and installation. Measuring devices, like a tape measure, level, and square ensure precise measurements and proper alignment. Those tools work side by side with cutting tools like a reciprocating saw, circular saw, or utility knife, so all cuts you make are precise. You should also be sure to have safety equipment, like safety glasses, work gloves, and dust masks, to protect you and anyone else who is working with you throughout the project.
Power tools play a role in a DIY bay window replacement project. A drill with various bits, a hammer, a pry bar, and screwdrivers help with both the disassembly and the installation tasks. Removing old bay windows often requires additional tools like a crowbar and demolition hammer for stubborn components. Weather-resistant exterior caulk, expanding foam insulation, and appropriate shims ensure proper sealing and alignment during installation.
Material selection directly impacts project success and long-term performance. High-quality flashing prevents leaks around the new window frame, while proper insulation maintains energy efficiency. Window shims allow for precise positioning and structural support during the bay window installation steps. Selecting the correct replacement window involves measuring the existing opening accurately and considering factors like frame material, glass type, and operating style to match both structural requirements and design preferences for the best results.
Preparing Your Home for Bay Window Removal
Preparation ensures the bay window replacement process proceeds smoothly and safely. Safety preparations begin with clearing the work area of furniture, decorations, and valuable items that could be damaged during the removal of old bay windows. Interior protection involves laying drop cloths or plastic sheets across floors and moving furniture near the window area. The workspace should extend at least 6 feet in all directions from the bay window to provide adequate room for tools and materials during the removal process.
Preparing the exterior requires establishing a safe working zone outside the home where debris can be collected and disposed of properly. Setting up scaffolding or ladders according to the manufacturer’s safety guidelines provides secure access to the bay window from outside. Homeowners should notify neighbors about the upcoming work and ensure proper permits are obtained if it’s required by local building codes. Weather plays an important role in scheduling, as removing old bay windows exposes the home’s interior to the elements.
The initial assessment phase involves examining the existing bay window structure for potential complications before beginning removal. This inspection includes checking for signs of water damage, rot, or structural issues around the window frame that might affect the bay window installation steps. Identifying if the window is attached with nails, screws, or if it’s secured with brackets, helps determine the appropriate removal approach. Taking detailed measurements and photographs documents the existing installation for reference during the replacement process, ensuring the new bay window fits properly within the existing opening.
Removing Interior Trim and Window Components
The bay window removal process begins with carefully dismantling interior trim pieces to avoid damage to surrounding walls. Start by scoring along caulk lines where trim meets the wall using a utility knife to prevent paint or drywall from tearing during removal. Interior window casing typically consists of head casing across the top and side casings along the vertical edges. Remove these pieces systematically by inserting a pry bar between the trim and wall, working slowly to maintain the wood’s integrity for potential reuse.
Window sash removal follows specific techniques depending on the bay window’s operating style. For double-hung windows within the bay structure, lift the lower sash slightly and angle it inward to disengage from the frame tracks. Casement windows require disconnecting crank mechanisms and hinges before lifting sashes away from their frames. During this phase of removing old bay windows, handle each sash carefully so you don’t break the glass and cause injury to yourself or others.
The process of disconnecting the window frame involves locating and removing all fasteners securing the unit to the rough opening. These typically include screws or nails driven through the frame into the surrounding structure. Check for additional attachment points around the bay window’s angled sides and bottom platform. Remove any remaining caulk or adhesive materials along the frame. This approach ensures clean removal without compromising the opening needed for the replacement unit.
Installing Your New Bay Window Frame and Structure
Positioning the new bay window frame requires precise measurements and careful handling to ensure proper alignment within the rough opening. The frame must be centered horizontally and vertically while maintaining consistent gaps around the perimeter for insulation and shimming. Using a level, check that the window sill sits perfectly horizontal before making any permanent attachments. The vertical sides should be plumb, which means they stand perfectly straight up and down without any lean or tilt that could affect window operation.
Securing the bay window frame involves multiple attachment points to distribute weight evenly across the supporting structure. Start by inserting shims at key locations around the frame perimeter, typically every 12 to 16 inches along the sides and bottom. Drive screws through the frame and shims into the rough opening, being careful not to over-tighten as this can bow the frame and prevent proper window operation. The angled side windows require additional support brackets underneath to handle the extended weight.
Weatherproofing begins immediately after securing the frame to prevent water and air leaks. Apply a continuous bead of exterior-grade caulk along the outside perimeter where the window frame meets the house siding or trim. Install proper flashing above the window head and along the sides, ensuring water flows away from the opening. Fill gaps between the frame and rough opening with expanding foam insulation, taking care not to overfill, as excess foam can distort the frame and stop the window from working properly.
Finishing Touches and the Completion of Interior Work
The final phase of bay window replacement focuses on creating a polished, professional appearance through careful interior finishing work. Installing window trim and molding serves both functional and aesthetic purposes by covering gaps between the new bay window frame and existing walls. Interior trim work begins with measuring and cutting head casing for the top of the window opening, followed by side casings that extend down each vertical edge. These pieces should fit tightly together at corners while maintaining consistent lines along the window frame.
Proper trim installation requires precise cutting and secure fastening for long-lasting results. Miter cuts at 45-degree angles create clean corner joints where head and side casings meet. Pre-drilling nail holes prevents splitting in hardwood trim pieces, while finishing nails driven below the surface allow for wood filler application. The trim should sit flush against both the wall surface and window frame, with consistent spacing that creates uniform lines around the entire opening.
Final sealing and caulking techniques complete the bay window installation process by eliminating water and air leaks. Apply a thin bead of paintable interior caulk along gaps between trim pieces and wall surfaces, smoothing with a finger or caulk tool for professional results. Touch-up paint work covers nail holes filled with wood putty and blends new trim with existing interior colors. Any necessary drywall repairs around the installation area should be completed using mesh tape and joint compound, sanded smooth, and painted to match surrounding surfaces for seamless integration with the home’s interior design.
Common Mistakes to Avoid and Maintenance Tips
Several critical errors can compromise bay window replacement projects and lead to expensive problems down the road. Measurement mistakes rank among the most frequent issues, occurring when homeowners fail to account for the bay window’s complex angles and multiple planes. Inaccurate measurements can result in gaps that allow air infiltration, or frames that don’t fit properly within the existing opening. During the window installation process, inadequate structural support for the extended weight of bay windows often creates sagging or operational problems over time.
Weatherproofing represents another common pitfall during a DIY bay window replacement project. Insufficient flashing installation or improper caulk application allows moisture to get into your home, which can damage surrounding framing materials. Many homeowners underestimate the importance of continuous air sealing around the entire bay window, which can lead to energy efficiency problems and comfort issues if done incorrectly.
Long-term maintenance ensures bay windows continue functioning properly and maintain their attractive appearance for decades. Seasonal inspections should include checking caulk lines for cracks or gaps that need refreshing, depending on weather exposure. Cleaning schedules for bay windows require attention to both interior and exterior glass surfaces, along with window tracks and hardware components. Regularly lubricating moving parts, inspecting the condition of weatherstripping, and making quick repairs on minor issues can prevent small problems from developing into major issues in the future.
Precision Door & Window: Your Partner in Bay Window Replacement
If you’re ready to transform your home’s appearance and energy efficiency with new bay windows, trust the expertise of Precision Door & Window. Replacing your bay windows is not just an upgrade in appearance, but a complex process that enhances comfort and value to your living space. Don’t navigate this project alone! Our skilled team is well-equipped to handle every aspect of bay window replacement, from initial measurements to the final touches, giving you a seamless and professional installation.
Why wait to enjoy the added benefits of a new bay window? Call Precision Door & Window today at (951) 595-0126 to schedule your consultation and take the first step towards a beautiful and energy-efficient home.